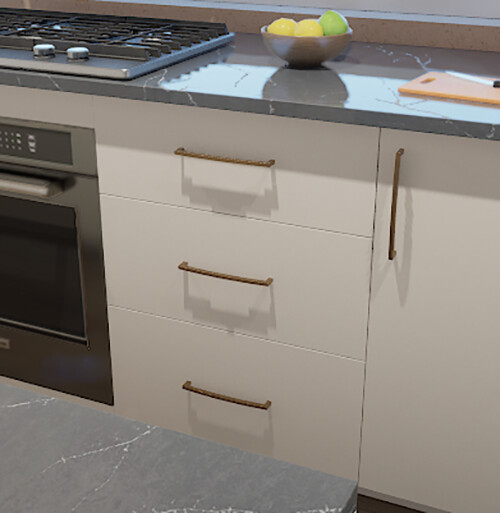
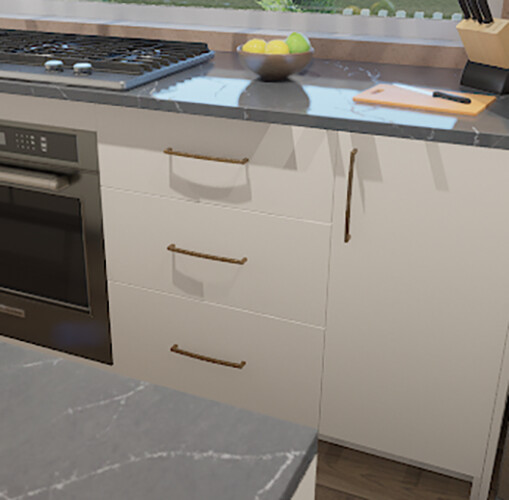
To make a Decal in unreal Engine only show in one direction, do this:
Sascha Henrichs
Unreal Engine Art, Virtual Production and Arch Viz
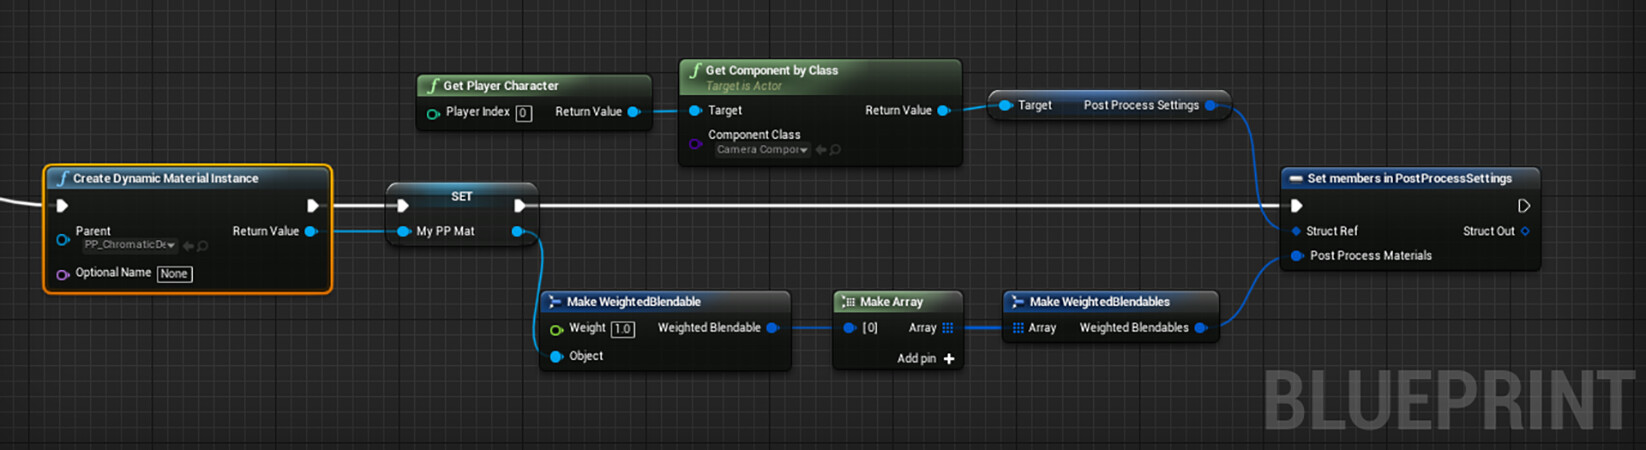
How to change a post process material runtime
General / 24 November 2023
i took this from this posting and repost it here to find it anytime :D
https://forums.unrealengine.com/t/change-post-process-material/448103
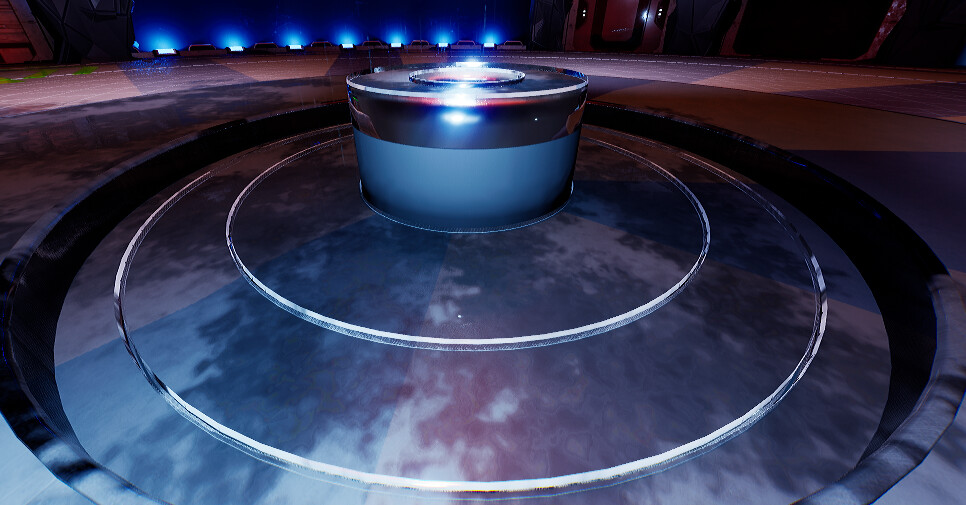
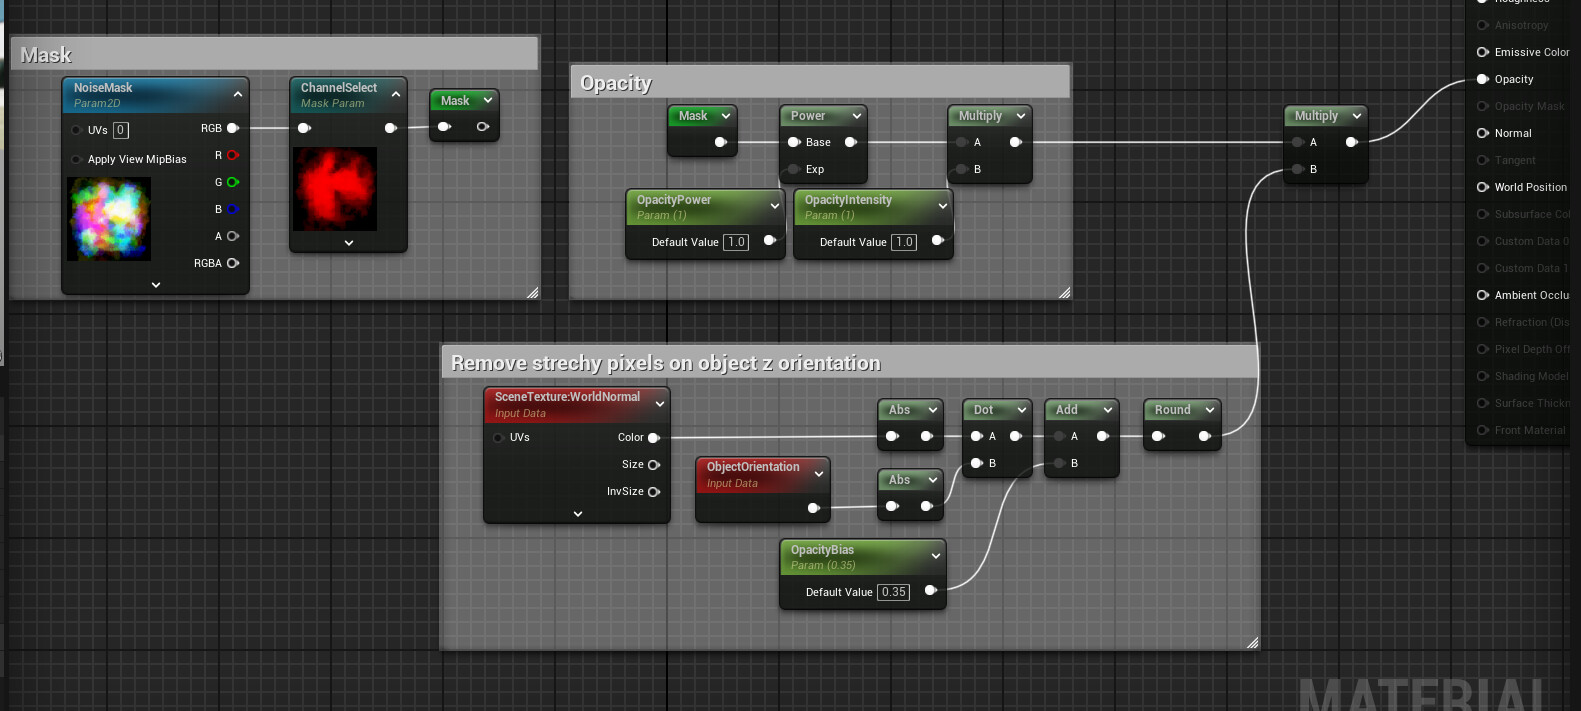
Blend a decal only from Z Object orientation
Tutorial / 07 November 2023

Fixing virtual shadow bugs in Unreal Engine 5 and Lumen
Article / 21 October 2023
When creating realtime Arch Viz scenes, you might have run into problems with virtual shadow artifacts.
This is how you fix two of these. :
Disclaimer: Idk if this is the only or best solution for these bugs, because they cause performance drops!!! if you have better ones, pls comment!
Chunky shadow cutouts
This is an easy one and happens when too much lights are lighting a pixel. use the console command:
r.Shadow.Virtual.OnePassProjection.MaxLightsPerPixel 32
Pixelated blocky shadows
This one is more tricky to fix.
First you want to check if you have any spotlights in the scene with large Outer Cone Angles


If this won't apply to you, you can try this:
You want to give the texture lod a small bias to render the full res shadow at larger distances.
The console command would be:
r.Shadow.Virtual.ResolutionLodBiasLocal -2 (or even lower -2.5)
While this fixes the issue, it may introduce a Virtual Shadow Map Page Pool overflow. It is another issue and you may end up with a scene like this:
To fix this, you can enlarge this value in the projects DefaultEngine.ini THIS COMMAND WONT WORK FROM WITHIN THE EDITOR CONSOLE:
Remember, when placing commands in the ini, you have to separate the command from the value with an equal sign "="
r.Shadow.Virtual.MaxPhysicalPages=16384
While the 16k may sound a bit large, it didnt cause any problems for my mobile 4080 GPU and I was able to render away
This will fix now both issues. The blocky shadows as also the Virtual Shadow Map Page Pool overflow.
For your convenience, you might want to put all your changes into your DefaultEngine.ini.
This may look like this:
; fix shadowbugs
r.Shadow.Virtual.MaxPhysicalPages=16384
r.Shadow.Virtual.ResolutionLodBiasLocal=-2
r.Shadow.Virtual.OnePassProjection.MaxLightsPerPixel=32
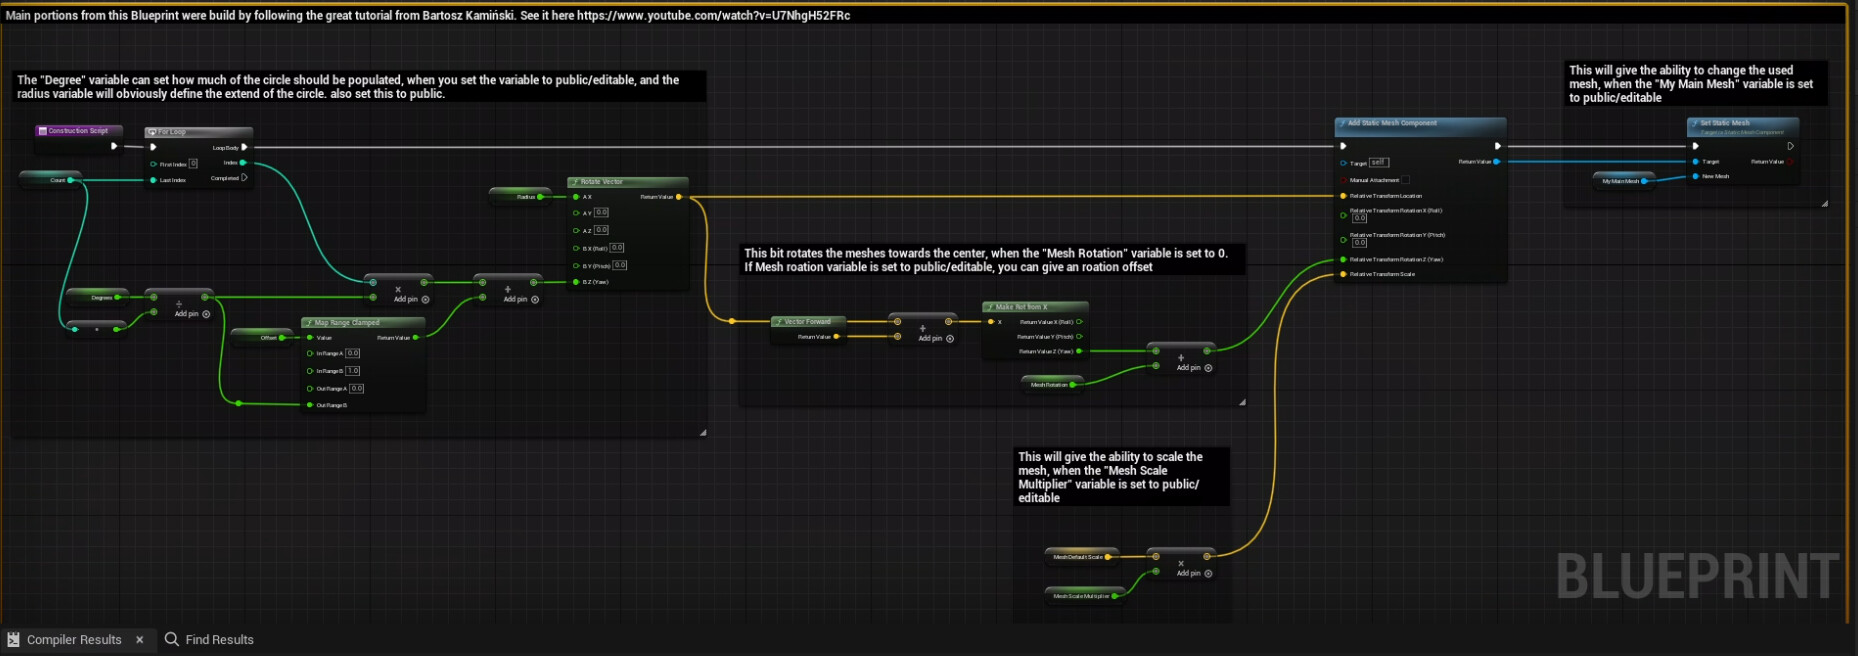
Rotate an Object via Vertex Shader | World Position Offset
Tutorial / 04 October 2023

Simple Vertex Color Breakup By Noise Texture in Unreal Engine
Tutorial / 28 June 2022
To break up vertex color blending, you can add a noise map that you subtracted by 1 to a vertex color that you multiplied by 2.
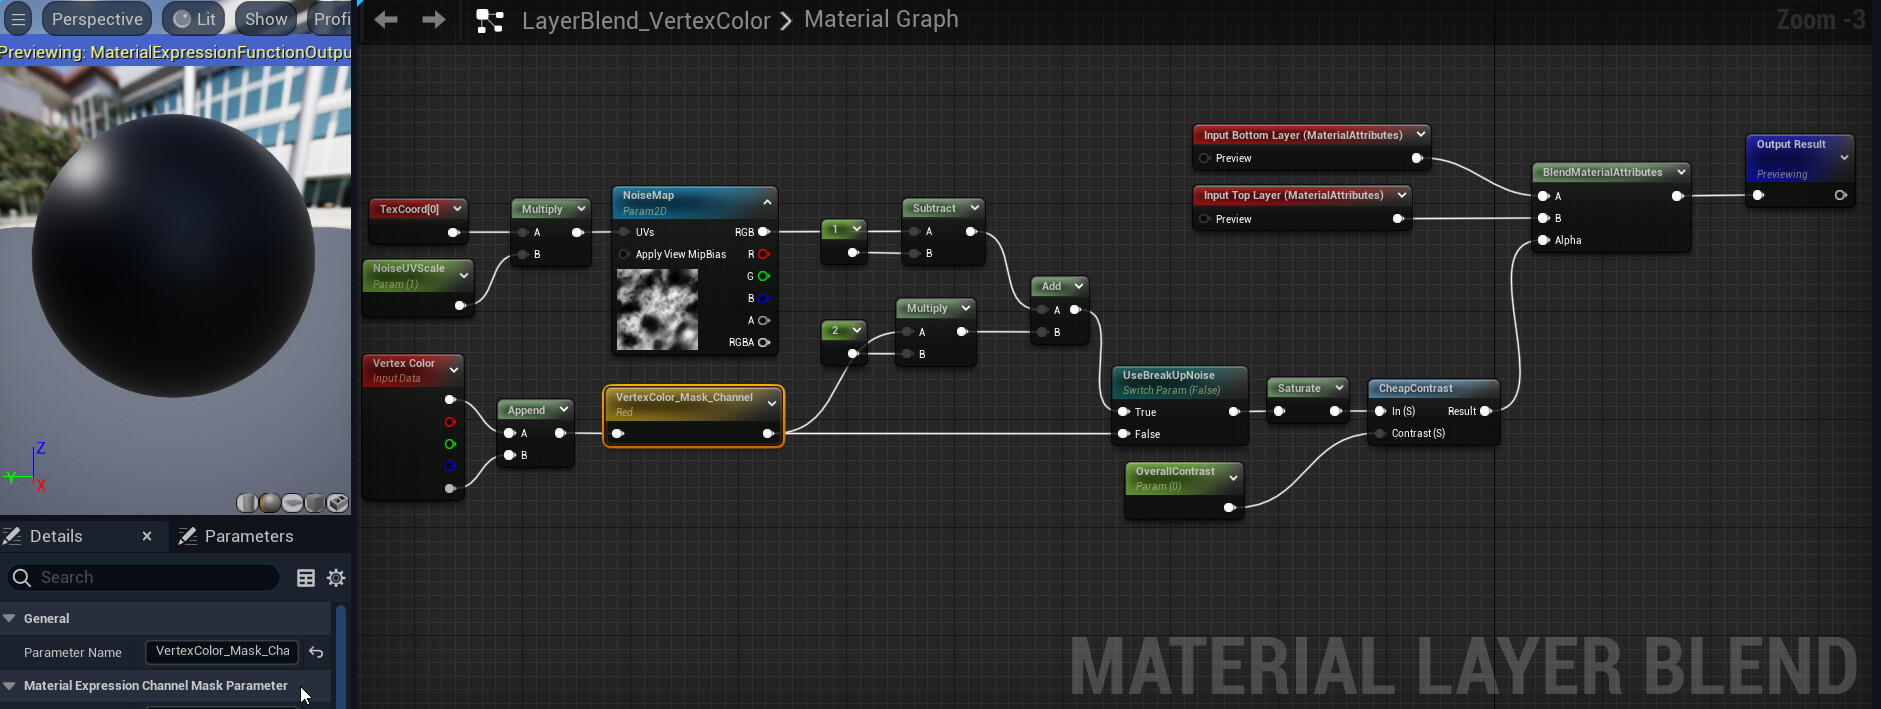
In this example it is used for a material layer blend function.
But you can utilize it also in normal functions or directly in materials.
Use the output as an alpha to drive some kind of lerp or blend.
nDo Photoshop script v0.6.66 from Quixel to create normal maps in Photoshop
General / 08 April 2022
I got the kind permission of Teddy from Quixel to share their old nDo script for Photoshop to create normal maps from color maps or from b/w masks.
The script seems to be eradicated from the internet for years, so perhaps it helps someone if it can be found here again.
Unfortunately I only have the version 0.6.66.
Since Adobe seems to phase out their 3D support and with it seemingly also their internal normalmap maker tool, and also since the Quixel suite is likely to be abandoned, the old nDo script comes in handy again when we want to create quick normalmaps right inside of photoshop, without having to mess with other software or online apps.
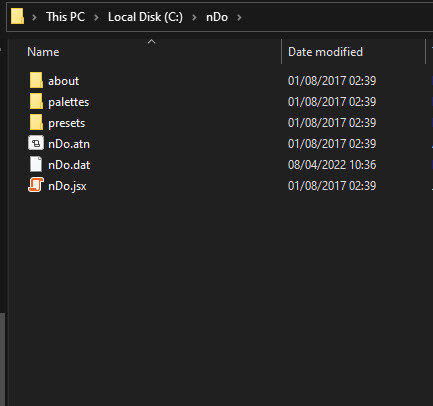
Download the script here
Then place the nDo folder right into the root of C:
Then open Photoshop and drag'n'drop the file
nDo.atn
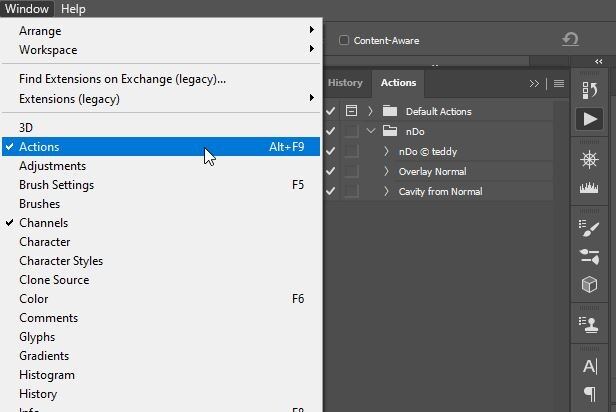
right into the actions window of PS.
When there is no Actions Tab, just open the Window menu and activate it.
Then just select the nDo script and press play, whilst having some kind of texture file open.
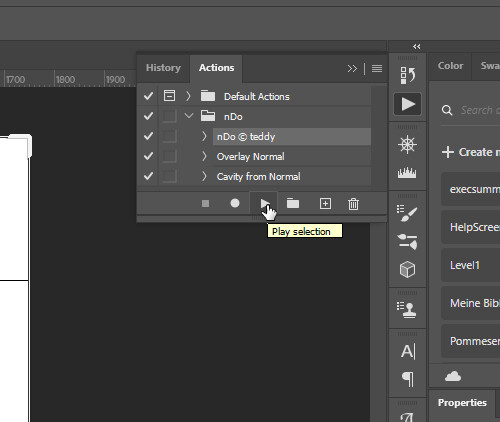
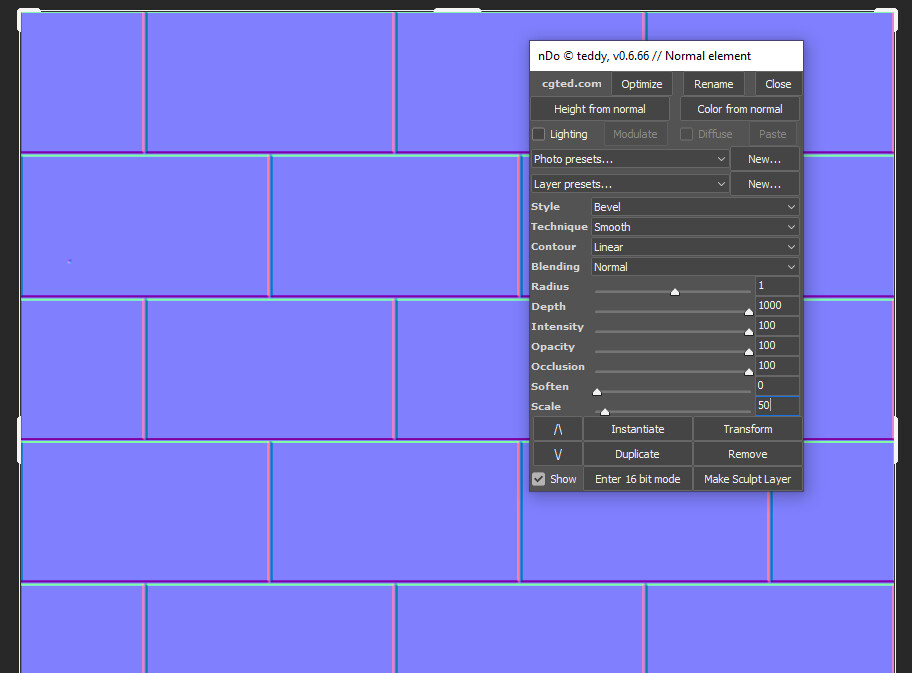
Then play around with all of its settings.
In order to create very deep normalmaps, you have to work with several layers that can be overlayed over another, each having a slightly higher radius.
For that author your first micro detail normal, then press duplicate, set it to overlay and adjust a higher radius and perhaps lower the depth a bit, then repeat the process until you are satisfied. Of course it helps to also take the other slider options into account, but that heavily depends on the source texture material.
Don't forget to flatten your normal and flip its green channel when exporting for Unreal (DX normal format)
Big THX to Teddy and all people who worked on this game changer back in the day!
Unreal Niagara: Color every second particle in a Particle Emitter
Tutorial / 13 March 2022
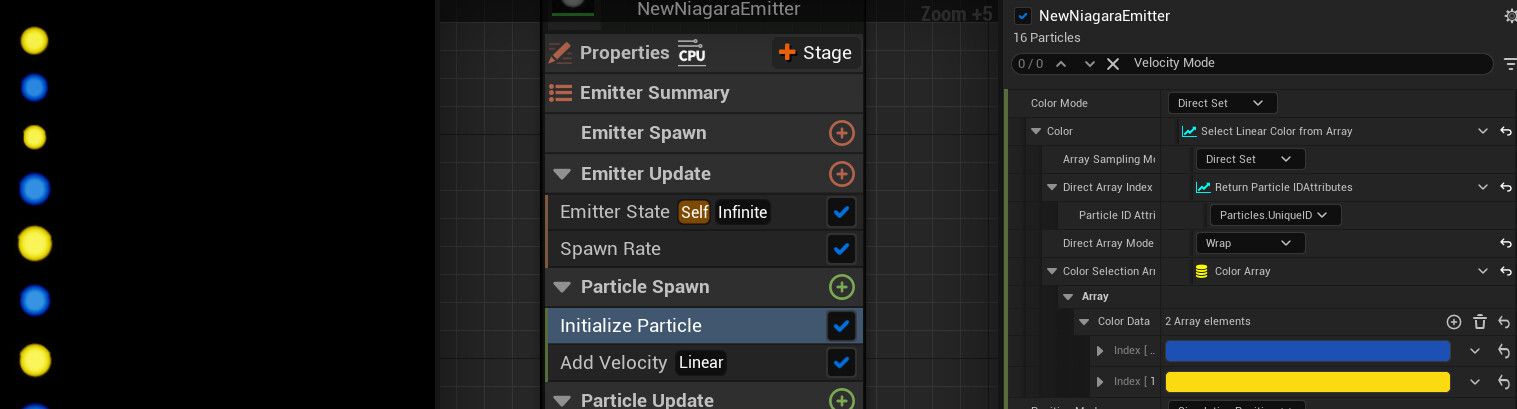
I needed a system that changed the color every other (persistent) particle.
This is how it worked for me.
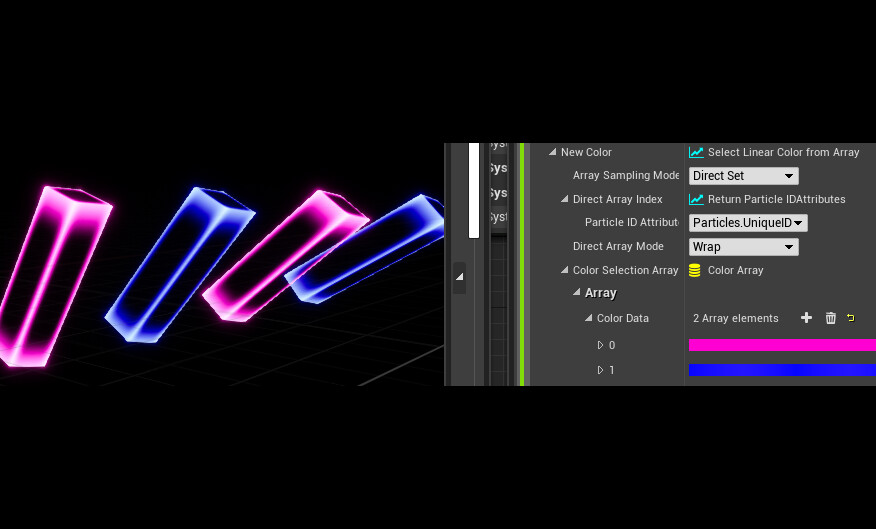
ok, since this small screenshot does seem to not explain all too well.
here some walkthrough:
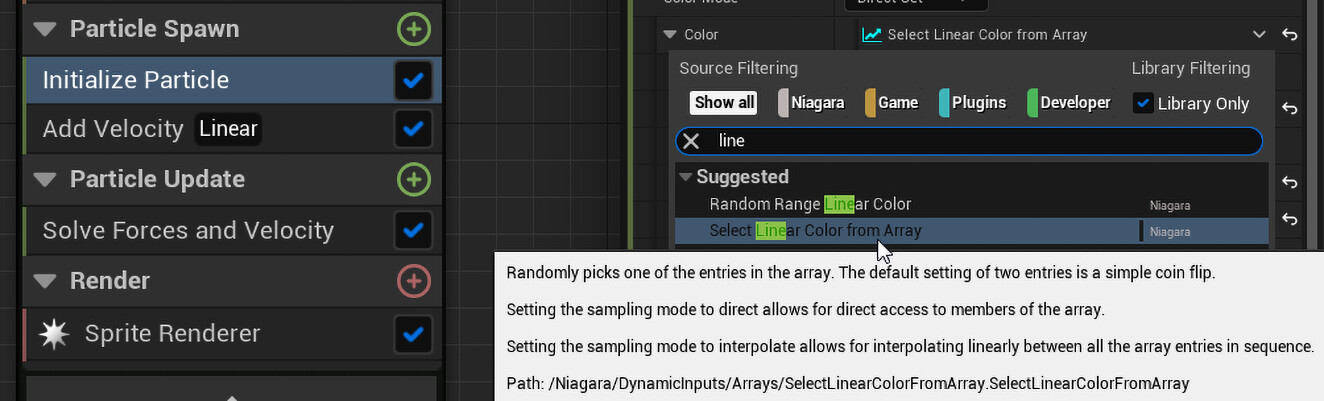
- just go to "initialize particle"
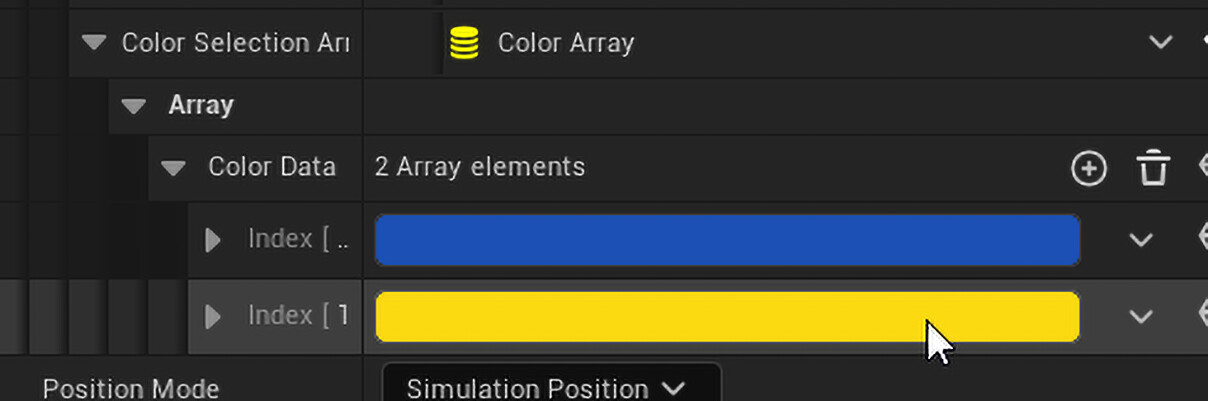
- then press the right rollout in the color section and set it to "select linear color from array"
- then press the right rollout in the "direct array index" and set it to "return particle ID attributes"
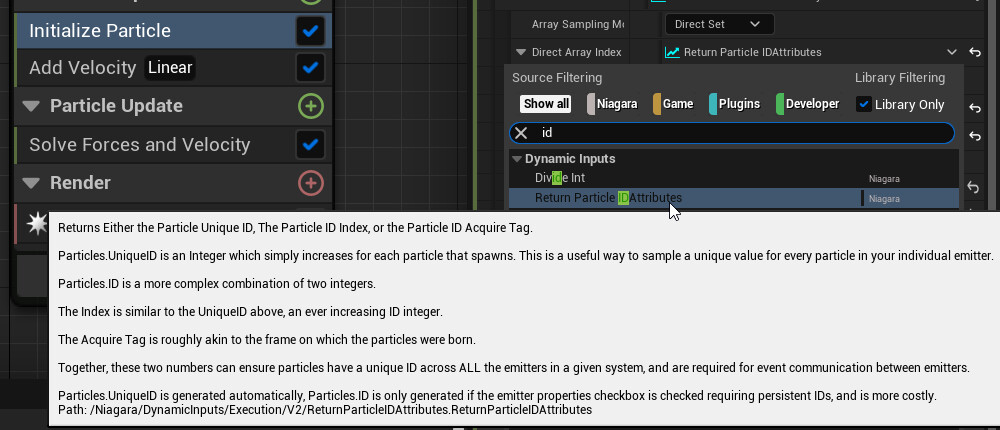
- Then set Array mode to Wrap

- Set the Colors